Logged in as a user, in Add Event page you will be able to set an audio playlist to play at a specific date on a radio channel.
In order to do that, you will need to click on Add Event button from the left side of the DashBoard area:
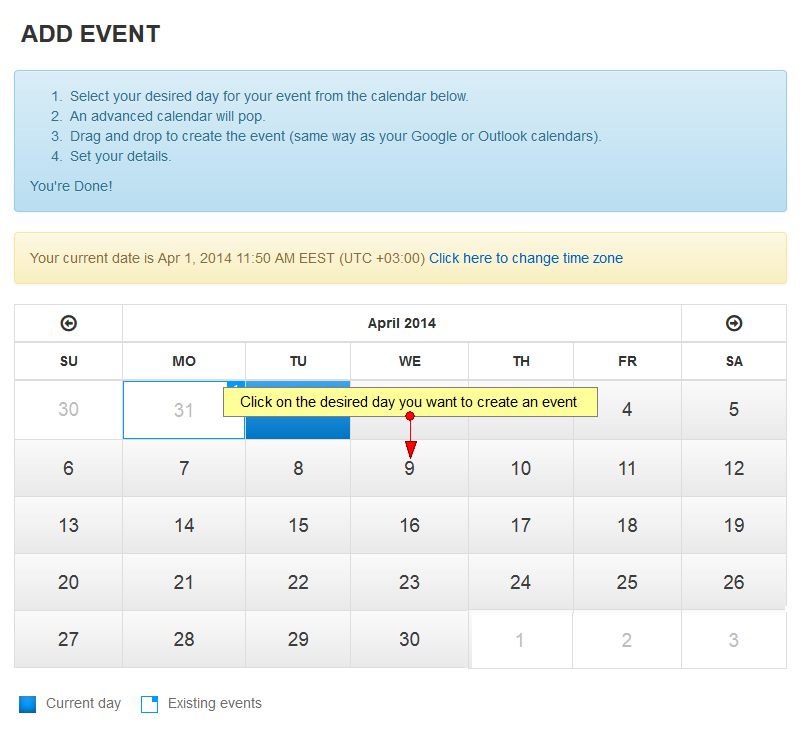
On Create new event page, you will view the calendar of the current month and you can start creating an event by selecting the desired day:
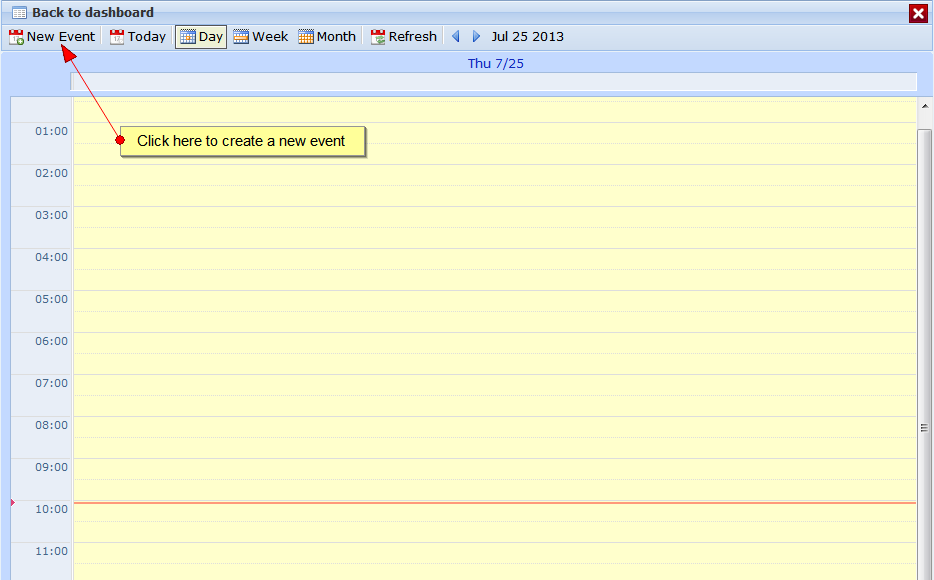
Once the calendar opens, click on the New Event tab or click on the page at the time you want the event to start:
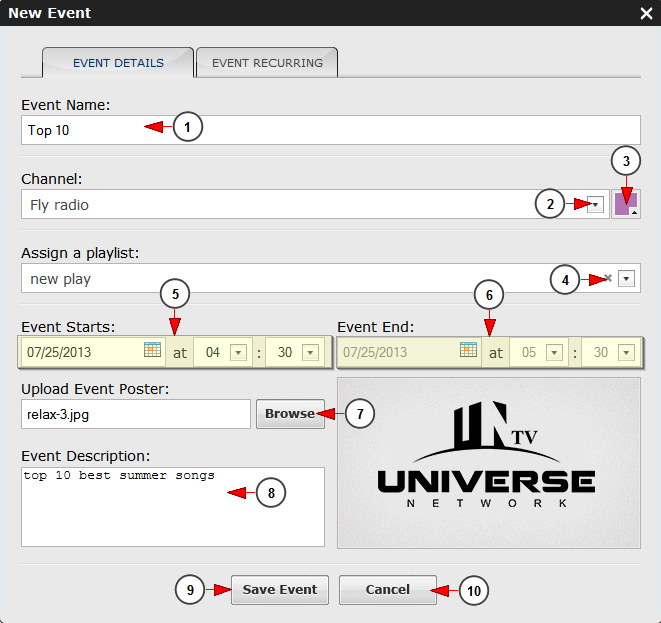
A pop-up window will open and you can schedule a playlist to a play on the desired channel:

1. Click here to insert the event name.
2. Click on the drop down list to choose the radio channel where you want the event to take place.
3. Click to choose a background color for your event.
4. Click here to select a playlist from the drop-down menu.
5. Here you can select the exact time when you want the event to start.
6. Here you can view the time when the event will end. It is automatically calculated based on the length of the playlist.
7. Click here to browse in your computer a poster for your event.
8. Click here to insert a description of the event you are creating.
9. Click the button to save event.
10. Click the button to cancel the details of the event.
Notes:
1. When an event is assigned to a radio channel, the Shoutcast server is restarted and due to this the endless loop playlist assigned to the radio channel will start playing from the beginning.
2. When a radio channel has a playlist assigned and an event is scheduled, the playlist from the event will start playing after the song that was on the previous playlist ends (e.g: if there is a 20 minutes song playing on the channel, the first song from the playlist assigned on the event will play after the actual 20 minutes song ends; so if the event is scheduled to start at 15:00, since the actual song is 20 minutes long, the event will start at 15:20 but on the scheduler it will be listed as starting at 15:00).
Event recurring
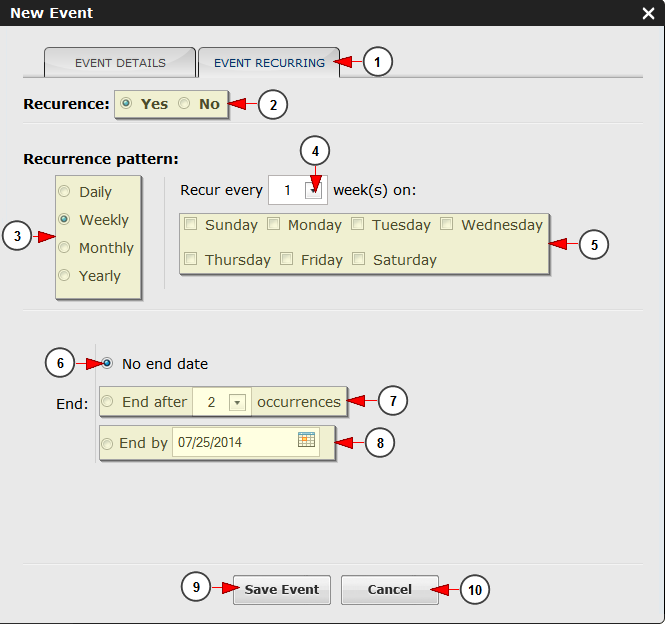
Click on the event recurring button on the header of the window to make the settings you prefer for your event:
1. Click here to edit the recurrence details of the event.
2. Check the Yes radio button if you want your event to be recurrent or check the No radio button if you don’t want your event to be recurrent.
3. Click the radio button which corresponds to the recurrence pattern you want: daily, weekly, monthly, yearly.
4. Click on the drop down list to select if you want the event to recur every day/week/month or year.
5. Check the box for the day of the week you want your event to take recur.
6. Check the radio button if you don’t want to set an end date of your event.
7. Check this radio button and select from the drop-down list how many occurrences you want for the event.
8. Check this radio button and select and then click on the calendar to choose an end date of your event.
9. Click the button to save the details for the event.
10. Click the button to cancel the settings you made.


